 Last fall I published a post detailing my approach to a DIY upholstered footstool. Giddy with self-empowerment and still wielding a staple gun, I decided to try my hand at a slightly bigger project: an upholstered headboard. If you’ve contemplated upholstering a headboard yourself, you should know there are lots of great tutorials and blogs about how to do it. I think it’s a good idea to check them out to see the range of style choices and options before you start your own project. You may decide button tufting or nailhead trim is the way you want to go. My approach is quite basic and perfect for beginners. Here’s my project and how I did it:
The first thing I should mention is that when I designed the bedroom originally, I had the builders create a recessed niche for the bed. We didn’t have a lot of space to work with, and gaining those four inches of depth made a big difference. My original plan was to put a beautiful hand-printed wallpaper on the back wall of the niche. But then I considered the deleterious effects of my husband’s hair gel, and my son who sometimes uses the wall as a Kleenex (Ew! I know!) A more rugged solution was in order, and I decided upholstery was the way to go.
STEP BY STEP INSTRUCTIONS:
1. Measure
My first step was to take careful measurements of the inside of the niche, since I wanted to headboard to fit the niche exactly. If you are not working within similar constraints, you’ll just need to know the width of your bedframe and the desired height of your headboard. I think it looks best when the headboard is an inch or two wider than the bedframe on each side.
2. Gather Materials
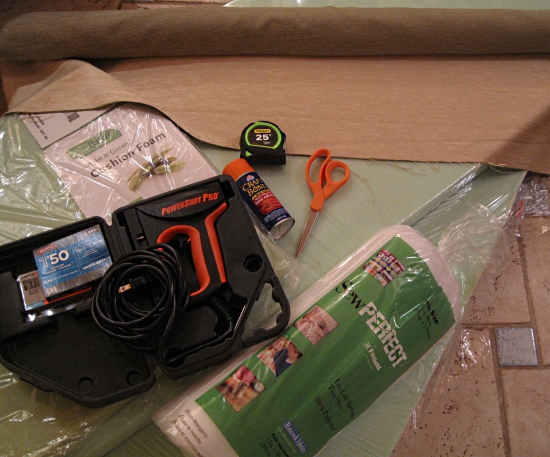
For a king sized headboard, I purchased 3 yards of fabric from Modern Fabrics in Charlotte. I opted to use a solid sandy-gold colored fabric with just a bit of nubby, velvety texture. It fit well with my vision of a soothing, restful retreat in beachy tones of blue, grey and soft gold. I also purchased a sufficient quantity of 2″ thick foam and polyester batting to cover the board. Finally, I visited the home improvement store to buy 1/2″ thick plywood. Uh oh! I quickly realized no way would such a large piece of plywood fit in my Honda Civic! I decided to have the plywood cut to size in two pieces. At that point I was thinking I’d fasten the two sections together and upholster in one big piece. With my trusty staple gun, scissors, and a can of spray adhesive, I was ready to go.
3. Measure and Cut Foam
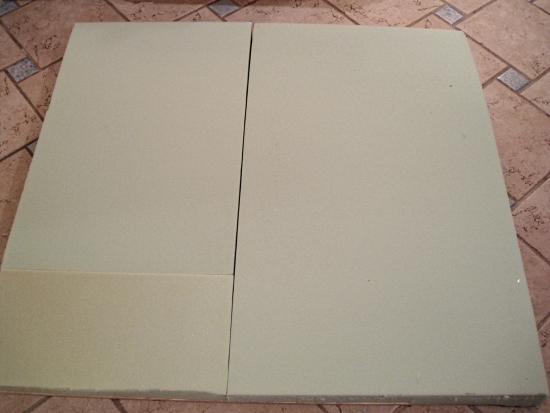
I started by measuring and cutting the foam to fit each plywood board. I sprayed the plywood with a little adhesive to keep the foam in place.
4. Wrap and Staple Batting

Next, I wrapped the batting snugly around the foam and plywood, stapling around the back edges of the board.
5. Wrap and Staple Fabric
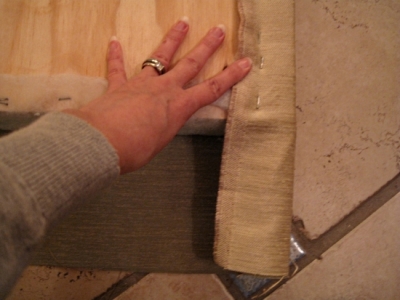
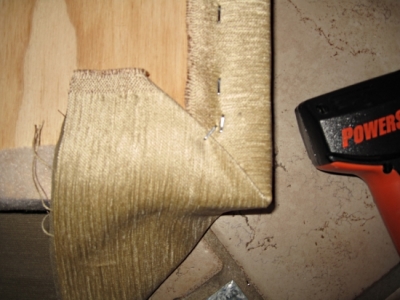
Starting at the corners then working my way in, I stapled the fabric to the back of the plywood. To keep the fabric evenly taut, I use d a LOT of staples – I spaced them about every inch.
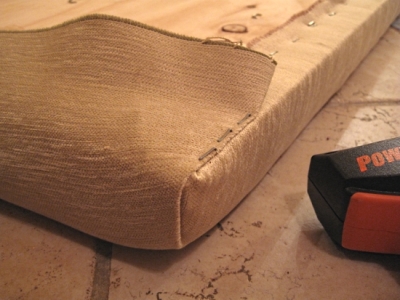
I trimmed a little of the fabric under the folded edge to keep it from getting too bulky. Here’s the completed corner.
6. Hang the Headboard
Unfortunately I don’t have any photos of me and my husband hanging the headboard. If I was just hanging it on the wall, and not fitting it into a niche, I would use a heavy duty art hanger (also known as a Z clip). The art hanger wouldn’t work in this instance because I wanted the headboard to fit snug against the top of the niche, whereas a Z clip would require the headboard to slide down in place from above. My solution was install L brackets on the wall below (using care to positon them on studs). Then we pushed each half of the headboard right into the niche. They’re so closely fitted that they stay in place no problem.
A Few More Notes…
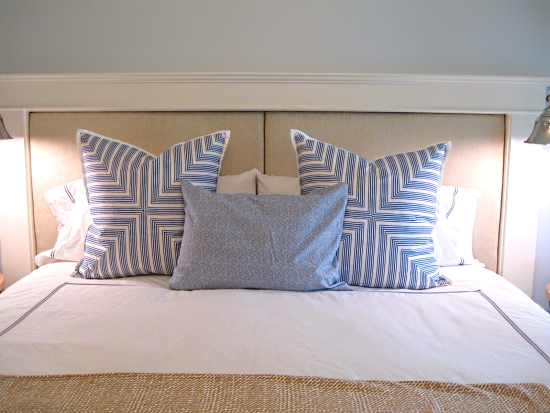
You may have noticed that I decided to upholster the headboard in two sections. This was for both practical and aesthetic reasons. I like the detail that the central “seam” adds to the finished look; it also makes the headboard a LOT easier to lift and fit into place. However, there’s no reason you couldn’t upholster your headboard in one piece using this same approach.
I also wrestled with the idea of adding button tufting. I do love the look of a button-tufted headboard, and I even went so far as to make the buttons to use in my project. After stewing over it for weeks, I ultimately decided I preferred the simplicity of the headboard just as it was.
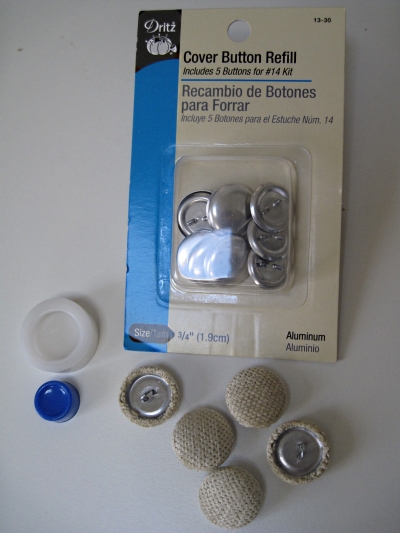
Optional: if you decide to add buttons to your headboard, you can use a kit like this to make fabric covered buttons.
We love our new headboard, and in retrospect I’m so glad I chose to do this instead of wallpaper. It’s so cozy to lean against while reading in bed.
I hope you’ve found this helpful, and if you decide to undertake a similar project yourself I’d love to hear about it!


